


[Sep-2021] Verified Linux Foundation Exam Dumps with CKA Exam Study Guide
Best Quality Linux Foundation CKA Exam Questions TestkingPass Realistic Practice Exams [2021]
NEW QUESTION 14
Get list of all pods in all namespaces and write it to file "/opt/pods-list.yaml"
Answer:
Explanation:
kubectl get po -all-namespaces > /opt/pods-list.yaml
NEW QUESTION 15
Create a pod that having 3 containers in it? (Multi-Container)
- A. image=nginx, image=redis, image=consul
Name nginx container as "nginx-container"
Name redis container as "redis-container"
Name consul container as "consul-container"
Create a pod manifest file for a container and append container
section for rest of the images
kubectl run multi-container --generator=run-pod/v1 --image=nginx --
dry-run -o yaml > multi-container.yaml
# then
vim multi-container.yaml
labels:
run: multi-container
name: multi-container
spec:
containers:
- image: nginx
name: nginx-container
- image: redis
name: consul-container
restartPolicy: Always - B. image=nginx, image=redis, image=consul
Name nginx container as "nginx-container"
Name redis container as "redis-container"
Name consul container as "consul-container"
Create a pod manifest file for a container and append container
section for rest of the images
kubectl run multi-container --generator=run-pod/v1 --image=nginx --
dry-run -o yaml > multi-container.yaml
# then
vim multi-container.yaml
apiVersion: v1
kind: Pod
metadata:
labels:
run: multi-container
name: multi-container
spec:
containers:
- image: nginx
name: nginx-container
- image: redis
name: redis-container
- image: consul
name: consul-container
restartPolicy: Always
Answer: B
NEW QUESTION 16
create a pod in a specific node (node1) by placing the pod definition file in a particular folder "/etc/kubernetes/manifests".
- A. Generate YAML before we SSH to the specific node, then copy the YAML into the exam notepad to use it after SSH into worker node.
SSH to the node: "ssh node1"
Gain admin privileges to the node: "sudo -i"
Move to the manifest-path "cd /etc/kubernetes/manifests"
Place the generated YAML into the folder "vi nginx.yaml"
Find the kubelet config file path "ps -aux | grep kubelet" . This
will output information on kubelet process. Locate the kubelet config
file location.
kubelet config file -- /var/lib/kubelet/config.yaml
Edit the config file "vi /var/lib/kubelet/config.yaml" to add
staticPodPath
staticPodPath: /etc/kubernetes/manifests
Restart the kubelet "systemctl restart kubelet" - B. Generate YAML before we SSH to the specific node, then copy the YAML into the exam notepad to use it after SSH into worker node.
SSH to the node: "ssh node1"
Gain admin privileges to the node: "sudo -i"
Move to the manifest-path "cd /etc/kubernetes/manifests"
kubelet config file -- /var/lib/kubelet/config.yaml
Edit the config file "vi /var/lib/kubelet/config.yaml" to add
staticPodPath
staticPodPath: /etc/kubernetes/manifests
Restart the kubelet "systemctl restart kubelet"
Answer: A
NEW QUESTION 17
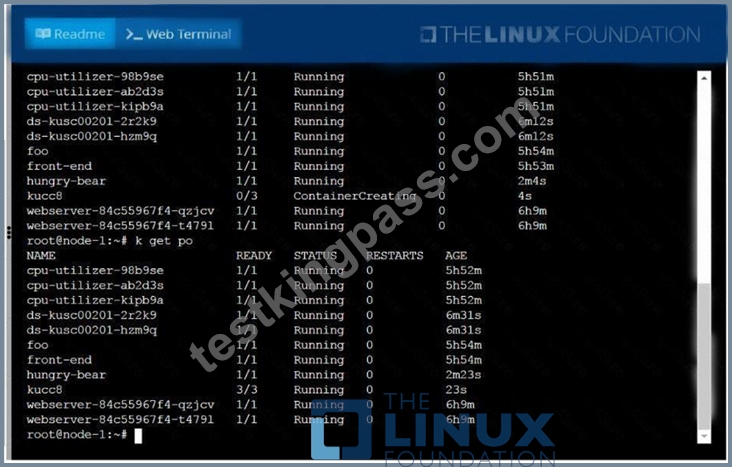
Create a pod named kucc8 with a single app container for each of the
following images running inside (there may be between 1 and 4 images specified):
nginx + redis + memcached.
Answer:
Explanation:
See the solution below.
Explanation
solution

NEW QUESTION 18
Create 5 nginx pods in which two of them is labeled env=prod and
three of them is labeled env=dev
- A. kubectl run nginx-dev1 --image=nginx --restart=Never --
labels=env=dev
kubectl run nginx-dev2 --image=nginx --restart=Never --
labels=env=dev
kubectl run nginx-dev3 --image=nginx --restart=Never --
labels=env=dev
kubectl run nginx-prod1 --image=nginx --restart=Never --
labels=env=prod
kubectl run nginx-prod2 --image=nginx --restart=Never --
labels=env=prod - B. kubectl run nginx-dev1 --image=nginx --restart=Never --
labels=env=dev
kubectl run nginx-dev2 --image=nginx --restart=Never --
labels=env=dev
kubectl run nginx-prod1 --image=nginx --restart=Never --
labels=env=prod
kubectl run nginx-prod2 --image=nginx --restart=Never --
labels=env=prod
Answer: A
NEW QUESTION 19
Score: 4%
Context
You have been asked to create a new ClusterRole for a deployment pipeline and bind it to a specific ServiceAccount scoped to a specific namespace.
Task
Create a new ClusterRole named deployment-clusterrole, which only allows to create the following resource types:
* Deployment
* StatefulSet
* DaemonSet
Create a new ServiceAccount named cicd-token in the existing namespace app-team1.
Bind the new ClusterRole deployment-clusterrole lo the new ServiceAccount cicd-token , limited to the namespace app-team1.
Answer:
Explanation:
See the solution below.
Explanation
Solution:
Task should be complete on node -1 master, 2 worker for this connect use command
[student@node-1] > ssh k8s
kubectl create clusterrole deployment-clusterrole --verb=create
--resource=deployments,statefulsets,daemonsets
kubectl create serviceaccount cicd-token --namespace=app-team1
kubectl create rolebinding deployment-clusterrole --clusterrole=deployment-clusterrole
--serviceaccount=default:cicd-token --namespace=app-team1
NEW QUESTION 20
Create a pod with environment variables as var1=value1.Check the environment variable in pod
- A. kubectl run nginx --image=nginx --restart=Never --env=var1=value1
# then
kubectl exec -it nginx -- env
# or
kubectl exec -it nginx -- sh -c 'echo $var1'
# or
kubectl describe po nginx | grep value1 - B. kubectl run nginx --image=nginx --restart=Never --env=var1=value1
# then
kubectl exec -it nginx -- env
# or
kubectl describe po nginx | grep value1
Answer: A
NEW QUESTION 21
Create 2 nginx image pods in which one of them is labelled with env=prod and another one labelled with env=dev and verify the same.
- A. kubectl run --generator=run-pod/v1 --image=nginx -- labels=env=prod nginx-prod --dry-run -o yaml > nginx-prodpod.yaml Now, edit nginx-prod-pod.yaml file and remove entries like "creationTimestamp: null" "dnsPolicy: ClusterFirst" vim nginx-prod-pod.yaml apiVersion: v1 kind: Pod metadata:
labels:
env: prod
name: nginx-prod
spec:
containers:
- image: nginx
name: nginx-prod
restartPolicy: Always
# kubectl create -f nginx-prod-pod.yaml
kubectl run --generator=run-pod/v1 --image=nginx --
labels=env=dev nginx-dev --dry-run -o yaml > nginx-dev-pod.yaml
apiVersion: v1
kind: Pod
metadata:
labels:
env: dev
name: nginx-dev
spec:
containers:
- image: nginx
name: nginx-dev
restartPolicy: Always
# kubectl create -f nginx-prod-dev.yaml
Verify :
kubectl get po --show-labels
kubectl get po -l env=prod
kubectl get po -l env=dev - B. kubectl run --generator=run-pod/v1 --image=nginx -- labels=env=prod nginx-prod --dry-run -o yaml > nginx-prodpod.yaml Now, edit nginx-prod-pod.yaml file and remove entries like "creationTimestamp: null" "dnsPolicy: ClusterFirst" vim nginx-prod-pod.yaml apiVersion: v1 kind: Pod metadata:
labels:
env: prod
name: nginx-prod
spec:
containers:
- image: nginx
name: nginx-prod
restartPolicy: Always
# kubectl create -f nginx-prod-pod.yaml
kubectl run --generator=run-pod/v1 --image=nginx --
labels=env=dev nginx-dev --dry-run -o yaml > nginx-dev-pod.yaml
apiVersion: v1
kind: Pod
metadata:
- image: nginx
name: nginx-dev
restartPolicy: Always
# kubectl create -f nginx-prod-dev.yaml
Verify :
kubectl get po --show-labels
kubectl get po -l env=dev
Answer: A
NEW QUESTION 22
Create a persistent volume with nameapp-data, of capacity2Giandaccess modeReadWriteMany. Thetype of volume ishostPathand itslocation is/srv/app-data.
Answer:
Explanation:
See the solution below.
Explanation
solution
Persistent Volume
A persistent volume is a piece of storage in aKubernetes cluster. PersistentVolumes are a cluster-level resource like nodes, which don't belong to any namespace. It is provisioned by the administrator and has a particular file size. This way, a developer deploying their app on Kubernetes need not knowthe underlying infrastructure.
When the developer needs a certain amount of persistent storage for their application, the system administrator configures the cluster so that they consume the PersistentVolume provisioned in an easy way.
Creating PersistentVolume
kind: PersistentVolumeapiVersion: v1metadata:name:app-dataspec:capacity: # defines the capacity of PV we are creatingstorage:2Gi#the amount of storage we are tying to claimaccessModes: # defines the rights of the volumewe are creating-ReadWriteManyhostPath:path: "/srv/app-data" # path to which we are creating the volume Challenge
* Create a Persistent Volume named ReadWriteMany, storage classname
shared,2Giof storage capacity and the host path
2. Save the file and create the persistent volume.
Image for post
3. View the persistent volume.
* Our persistent volume status is available meaning it is available and it has not been mounted yet. This status willchange when we mount the persistentVolume to a persistentVolumeClaim.
PersistentVolumeClaim
In a real ecosystem, a system admin will create the PersistentVolume then a developer will create a PersistentVolumeClaim which will be referenced in a pod. A PersistentVolumeClaim is created by specifying the minimum size and the access mode they require from the persistentVolume.
Challenge
* Create a Persistent Volume Claim that requests the Persistent Volume we had created above. The claim should request 2Gi. Ensurethat the Persistent Volume Claim has the same storageClassName as the persistentVolume you had previously created.
kind: PersistentVolumeapiVersion: v1metadata:name:
spec:
accessModes:-ReadWriteManyresources:
requests:storage:2Gi
storageClassName:shared
2. Save and create the pvc
njerry191@cloudshell:~(extreme-clone-2654111)$ kubect1 create -f app-data.yaml persistentvolumeclaim/app-data created
3. View the pvc
Image for post
4. Let's see what has changed in the pv we had initially created.
Image for post
Our status has now changed fromavailabletobound.
5. Create a new pod named myapp with image nginx that will be used to Mount the Persistent Volume Claim with the path /var/app/config.
Mounting a Claim
apiVersion: v1kind: Podmetadata:creationTimestamp: nullname: app-dataspec:volumes:- name:congigpvcpersistenVolumeClaim:claimName: app-datacontainers:- image: nginxname:
appvolumeMounts:- mountPath: "
NEW QUESTION 23
Scale the deployment from 5 replicas to 20 replicas and verify
Answer:
Explanation:
kubectl scale deploy webapp --replicas=20 kubectl get deploy webapp kubectl get po -l app=webapp
NEW QUESTION 24
List all the pods that are serviced by the service "webservice" and copy the output in /opt/$USER/webservice.targets Note: You need to list the endpoints
Answer:
Explanation:
kubectl descrive svc webservice | grep -i "Endpoints" > /opt/$USER/webservice.targets kubectl get endpoints webservice > /opt/$USER/webservice.targets
NEW QUESTION 25
A Kubernetes worker node, named wk8s-node-0 is in state NotReady. Investigate why this is the case, and perform any appropriate steps to bring the node to a state, ensuring that any changes are made permanent.
You can ssh to the failed node using:
[student@node-1] $ | ssh Wk8s-node-0
You can assume elevated privileges on the node with the following command:
[student@w8ks-node-0] $ | sudo -i
Answer:
Explanation:
See the solution below.
Explanation
solution
F:\Work\Data Entry Work\Data Entry\20200827\CKA\20 C.JPG
F:\Work\Data Entry Work\Data Entry\20200827\CKA\20 D.JPG
F:\Work\Data Entry Work\Data Entry\20200827\CKA\20 E.JPG
NEW QUESTION 26
Get list of persistent volumes and persistent volume claim in the cluster
Answer:
Explanation:
kubectl get pv kubectl get pvc
NEW QUESTION 27
Get the pods with label env=dev and output the labels
Answer:
Explanation:
kubectl get pods -l env=dev --show-labels
NEW QUESTION 28
Deployment
a. Create a deployment of webapp with image nginx:1.17.1 with
container port 80 and verify the image version
- A. // Create initial YAML file with -dry-run option
kubectl create deploy webapp --image=nginx:1.17.1 --dryrun=client -o yaml > webapp.yaml vim webapp.yaml apiVersion: apps/v1 kind: Deployment metadata:
labels:
app: webapp
name: webapp
spec: replicas: 1 selector: matchLabels: app: webapp template: metadata: labels: app: webapp spec: containers: - image: nginx:1.17.1 name: nginx kubectl create -f webapp.yaml -record=true //Verify Image Version kubectl describe deploy webapp | grep -i "Image" Using JsonPath kubectl get deploy -o=jsonpath='{range.items [*]}{.[*]} {.metadata.name}{"\t"}{.spec.template.spec.containers[*].i mage}{"\n"}' - B. // Create initial YAML file with -dry-run option
kubectl create deploy webapp --image=nginx:1.17.1 --dryrun=client -o yaml > webapp.yaml vim webapp.yaml apiVersion: apps/v1 kind: Deployment metadata:
labels:
app: webapp
name: webapp
spec: replicas: 1 containers: - image: nginx:1.17.1 name: nginx kubectl create -f webapp.yaml -record=true //Verify Image Version kubectl describe deploy webapp | grep -i "Image" Using JsonPath kubectl get deploy -o=jsonpath='{range.items [*]}{.[*]} {.metadata.name}{"\t"}{.spec.template.spec.containers[*].i mage}{"\n"}'
Answer: A
NEW QUESTION 29
Check the rollout history and make sure everything is ok after the update
- A. kubectl rollout history deploy webapp
kubectl get deploy webapp --show-labels
kubectl get rs -
kubectl get po -l app=webapp - B. kubectl rollout history deploy webapp
kubectl get deploy webapp --show-labels
kubectl get rs -l app=webapp
kubectl get po -l app=webapp
Answer: B
NEW QUESTION 30
Score: 4%
Task
Create a pod named kucc8 with a single app container for each of the following images running inside (there may be between 1 and 4 images specified): nginx + redis + memcached .
Answer:
Explanation:
See the solution below.
Explanation
Solution:
kubectl run kucc8 --image=nginx --dry-run -o yaml > kucc8.yaml
# vi kucc8.yaml
apiVersion: v1
kind: Pod
metadata:
creationTimestamp: null
name: kucc8
spec:
containers:
- image: nginx
name: nginx
- image: redis
name: redis
- image: memcached
name: memcached
- image: consul
name: consul
#
kubectl create -f kucc8.yaml
#12.07
NEW QUESTION 31
Create a Pod nginx and specify both CPU, memory requests and limits together and verify.
- A. kubectl run nginx-request --image=nginx --restart=Always --dryrun -o yaml > nginx-request.yml
// add the resources section and create
apiVersion: v1
kind: Pod
metadata:
labels:
run: nginx
name: nginx-request
spec:
containers:
- image: nginx
name: nginx
resources:
requests:
memory: "100Mi"
cpu: "0.5"
limits:
memory: "200Mi"
cpu: "1"
restartPolicy: Always
k kubectl apply -f nginx-request.yaml
// Verify
Kubectl top po - B. kubectl run nginx-request --image=nginx --restart=Always --dryrun -o yaml > nginx-request.yml
// add the resources section and create
apiVersion: v1
kind: Pod
metadata:
labels:
run: nginx
name: nginx
resources:
requests:
memory: "100Mi"
cpu: "0.4"
limits:
memory: "200Mi"
cpu: "7"
restartPolicy: Always
k kubectl apply -f nginx-request.yaml
// Verify
Kubectl top po
Answer: A
NEW QUESTION 32
Schedule a pod as follows:
Name: nginx-kusc00101
Image: nginx
Node selector: disk=ssd
Answer:
Explanation:
See the solution below.
Explanation
solution
F:\Work\Data Entry Work\Data Entry\20200827\CKA\6 B.JPG
F:\Work\Data Entry Work\Data Entry\20200827\CKA\6 C.JPG
F:\Work\Data Entry Work\Data Entry\20200827\CKA\6 D.JPG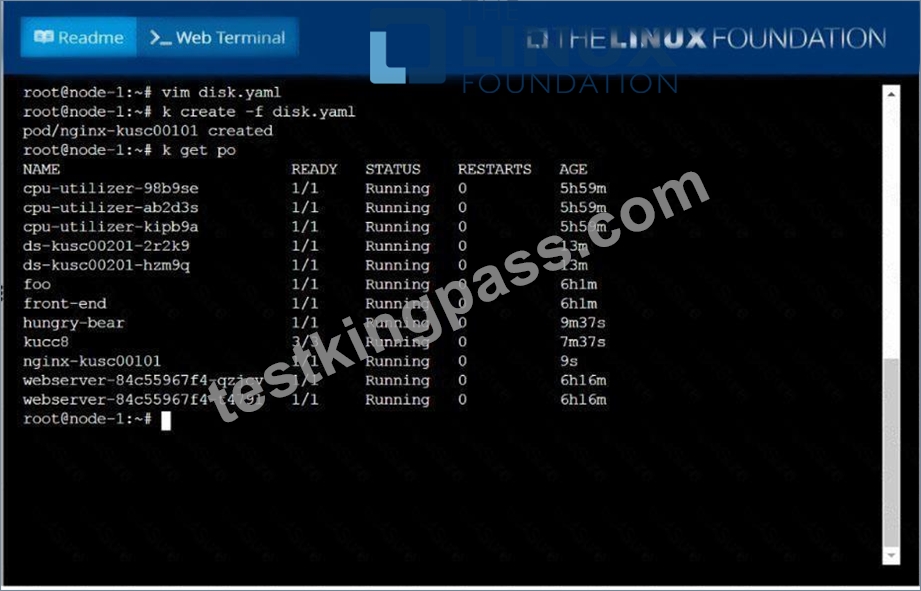
NEW QUESTION 33
Create the deployment redis with image=redis and expose it with "NodePort" service redis-service
- A. kubectl create deploy redis --image=redis --dry-run -o yaml >
redis-deploy.yaml
Edit redis-deploy.yaml file
name: redis
spec:
replicas: 1
selector:
matchLabels:
app: redis
template:
metadata:
labels:
app: redis
spec:
containers:
- image: redis
name: redis
//Creating Service
kubectl expose deploy redis --type=NodePort --port=6379 --
target-port=6379 --name redis-service
// Verify
kubectl get deploy,svc - B. kubectl create deploy redis --image=redis --dry-run -o yaml >
redis-deploy.yaml
Edit redis-deploy.yaml file
vim redis-deploy.yaml
apiVersion: apps/v1
kind: Deployment
metadata:
labels:
app: redis
name: redis
spec:
replicas: 1
selector:
matchLabels:
app: redis
template:
metadata:
labels:
app: redis
spec:
containers:
- image: redis
name: redis
//Creating Service
kubectl expose deploy redis --type=NodePort --port=6379 --
target-port=6379 --name redis-service
// Verify
kubectl get deploy,svc
Answer: B
NEW QUESTION 34
Get list of PVs and order by size and write to file "/opt/pvstorage.txt"
Answer:
Explanation:
kubectl get pv --sort-by=.spec.capacity.storage > /opt/pv storage.txt
NEW QUESTION 35
Perform the following tasks:
* Add an init container tohungry-bear(which has beendefined in spec file
/opt/KUCC00108/pod-spec-KUCC00108.yaml)
* The init container should createan empty file named/workdir/calm.txt
* If/workdir/calm.txtis notdetected, the pod should exit
* Once the spec file has beenupdatedwith the init containerdefinition, the pod should becreated
Answer:
Explanation:
See the solution below.
Explanation
solution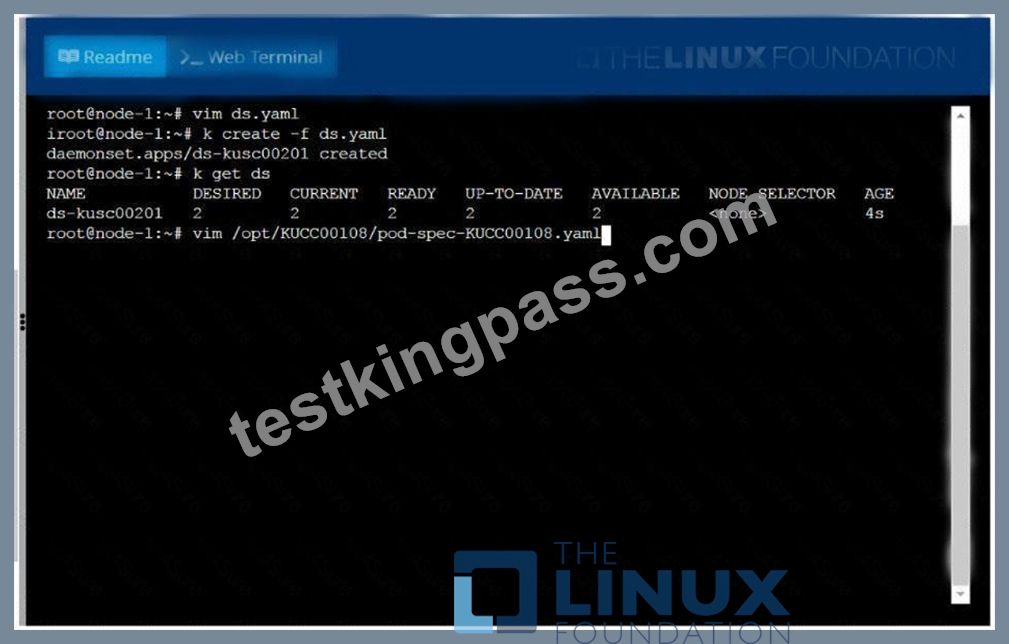


NEW QUESTION 36
......
Authentic Best resources for CKA: https://www.testkingpass.com/CKA-testking-dumps.html
CKA Test Engine Practice Exam: https://drive.google.com/open?id=1QrofubyMlU8axMBOdgFwjZucMnZvb6q5